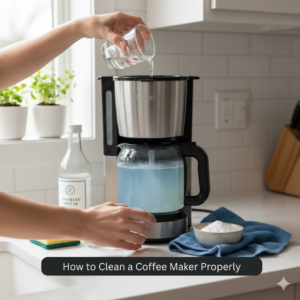
Introduction
Is your morning coffee tasting a little bitter? Is your machine taking longer than usual to brew, or making strange gurgling noises? Before you go out and buy a new bag of expensive beans, check your equipment.
Over time, mineral deposits from water (limescale), old coffee oils, and even mold can build up inside your coffee maker. This not only ruins the flavor of your coffee but can also damage the machine and affect your health.
In this guide, we will walk you through the simple, step-by-step process of deep cleaning and descaling your coffee maker. Whether you have a standard drip machine or a Keurig, we’ve got you covered.
🛠 What You Will Need
Before you start, gather these common household items. You don’t need expensive chemicals to get the job done right.
- Distilled White Vinegar (The most effective natural cleaner)
- Fresh Water
- Mild Dish Soap
- Sponge or Microfiber Cloth
- Damp Paper Towel
- Optional: Baking soda (for scrubbing the carafe)
Step-by-Step: Deep Cleaning a Drip Coffee Maker
Follow this method once a month to keep your machine running smoothly.
Step 1: Empty and Rinse
Remove any leftover coffee grounds and the disposable paper filter. Dump out any remaining water in the reservoir. Take the glass carafe and the removable filter basket to the sink and wash them with warm, soapy water to remove surface oils.
Step 2: Mix Your Cleaning Solution
Fill the glass carafe with a mixture of one part white vinegar and one part water.
(Example: If your machine makes 12 cups, use 6 cups of vinegar and 6 cups of water).
Pour this solution into the water reservoir.
Step 3: The Brew and Soak Cycle
Turn the coffee maker on and start a brew cycle.
- Crucial Tip: Let the machine brew until the carafe is about halfway full. Then, turn the coffee maker OFF.
- Let the hot vinegar solution sit inside the machine’s internal pipes for 30 to 60 minutes. This soaking period allows the acid to break down stubborn mineral buildup (descaling).
Step 4: Finish the Cycle
After the hour is up, turn the machine back on and let it finish brewing the rest of the vinegar solution into the carafe. Dump this dirty water down the sink (you might see some white flakes—that’s the limescale leaving your machine!).
Step 5: The Fresh Water Rinse
Now, you need to flush out the vinegar smell. Fill the reservoir with clean, fresh water (no vinegar) and run a full brew cycle.
- Repeat this step at least 2 times.
- Sniff the machine; if it still smells like a salad dressing, run one more fresh water cycle.
Step 6: Clean the Exterior
While the machine is running its rinse cycles, use a damp cloth to wipe down the outside of the machine. Dust often settles on the warming plate and the lid.
How to Clean a Keurig (Single-Serve) Machine
Cleaning a pod machine is slightly different but just as important.
- Wash Removable Parts: Remove the water reservoir, drip tray, and K-cup holder. Wash them in warm soapy water.
- Clean the Needle: Use a clean paper clip to gently clear out any coffee grounds stuck in the piercing needle (be careful, it’s sharp!).
- The Vinegar Cycle: Fill the reservoir with half vinegar, half water. Run brew cycles (without a pod) into a mug, dumping the mug each time, until the “Add Water” light comes on.
- Let it Sit: Let the machine sit with the residual vinegar solution for 30 minutes.
- Rinse: Fill the reservoir with fresh water and run cycles until the tank is empty to flush the system.
Maintenance Tips: Keep Your Coffee Fresh
- Daily: Always throw away wet grounds immediately. Leaving them sits invites mold growth.
- Weekly: Wash the carafe and filter basket in the dishwasher (if safe) or with hot soapy water.
- Monthly: Perform the deep vinegar clean (descaling) described above.
- Water Matters: If you have hard tap water, consider using filtered water to brew. This drastically reduces mineral buildup.
Frequently Asked Questions (FAQ)
Q: Can I use apple cider vinegar instead of white vinegar?
A: Yes, you can, but white vinegar is preferred. Apple cider vinegar leaves a stronger scent and flavor that is harder to rinse out. If you use apple cider vinegar, you may need extra rinse cycles.
Q: My coffee maker has a “Clean” button. How do I use it?
A: The “Clean” button is a pre-programmed cycle that usually employs a start-stop brewing method to soak the lines (similar to Step 3 above). Add your vinegar solution, press the “Clean” button, and wait for the light to turn off.
Q: What if I don’t want to use vinegar?
A: You can mix lemon juice with water (1:1 ratio) as a natural alternative. Or, you can purchase a commercial “Coffee Machine Descaling Solution” from Amazon or a grocery store.
Q: Why is my coffee maker brewing so slowly?
A: This is the #1 sign of calcification (mineral buildup). The minerals are clogging the water tubes, making the pump work harder. A deep vinegar soak will fix this.
Q: Is mold in a coffee maker dangerous?
A: Yes. Coffee makers are warm, damp environments—perfect for mold and bacteria. Ingesting mold can cause allergic reactions or stomach issues. Regular cleaning prevents this.
Final Verdict
A clean coffee maker is the secret to a barista-quality cup at home. You don’t need a new machine; you just need some vinegar and an hour of your time. Make this routine a habit once a month, and your coffee will taste smoother, hotter, and fresher every single morning.
Now, go enjoy that fresh cup! ☕