






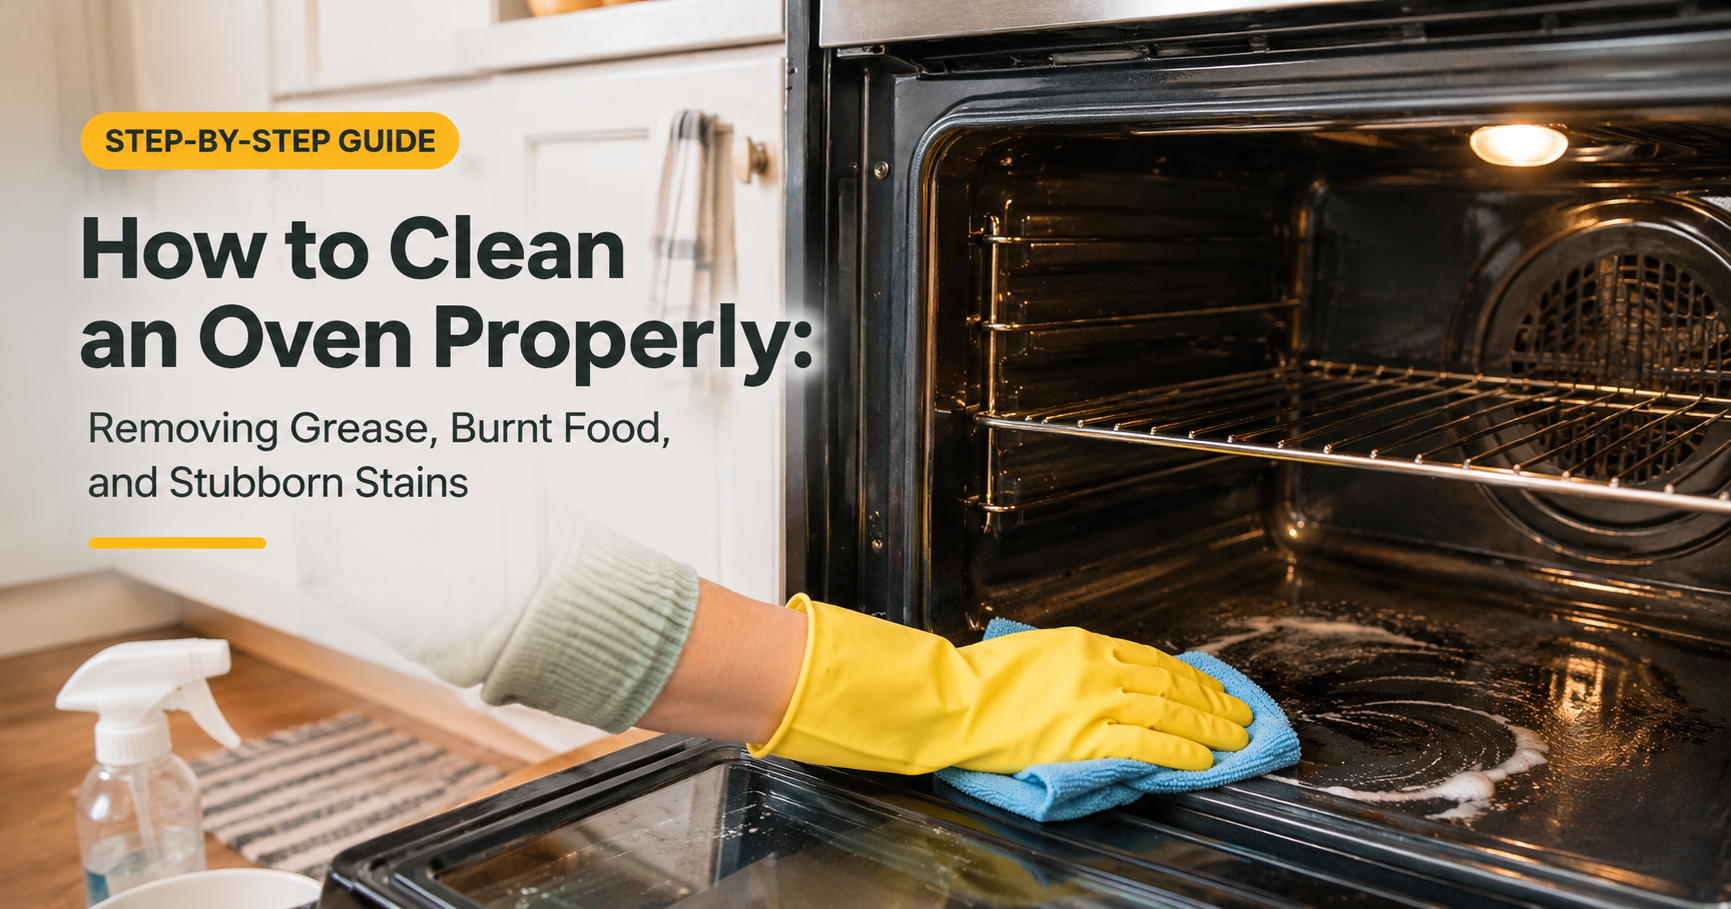
How to Clean an Oven: 4 Easy Methods, Step-by-Step Guide and Pro Tips

Few kitchen jobs get put off as long as cleaning the oven. Splatters turn into crusty black patches, the glass door goes cloudy, and one day you open it to a puff of smoke from last month’s lasagna. The good news is that a dirty oven is easier to fix than it looks, and you do not need harsh chemicals or hours of scrubbing to do it.
In this complete guide, you will learn how to clean an oven using four proven methods, how to deal with racks and the glass door, which parts to leave alone, how often to clean, and how to prevent the mess from building up again. You will also find a troubleshooting table, a buying guide and answers to common questions.
Table of Contents
- Why Cleaning Your Oven Matters
- How Often Should You Clean an Oven?
- Before You Start: Safety First and Supplies
- Which Cleaning Method Should You Choose?
- Method 1: Baking Soda and Vinegar
- Method 2: The Self-Clean Cycle
- Method 3: Commercial Oven Cleaner
- Method 4: Steam Cleaning for Light Messes
- How to Clean Oven Racks
- How to Clean the Oven Door and Glass
- What to Clean, and What to Leave Alone
- Special Cases: Gas, Electric, Steam and Continuous-Clean Ovens
- Troubleshooting Stubborn Stains
- How to Keep Your Oven Cleaner for Longer
- Common Mistakes to Avoid
- Choosing Oven Cleaning Products and Tools
- Frequently Asked Questions
- Final Thoughts
Why Cleaning Your Oven Matters
A clean oven is about more than appearance.
- Less smoke and bad smells. Old grease and food burn every time the oven heats up, causing smoke and a stale odor.
- Better-tasting food. Burnt residue can transfer odors and flavors to what you cook.
- Safer cooking. Heavy grease buildup can smoke heavily and, in the worst cases, catch fire.
- More even results. A clean door window lets you check on food without opening the door, which helps keep the temperature steady.
- A longer-lasting appliance. Regular cleaning prevents baked-on grime from damaging the enamel lining.
How Often Should You Clean an Oven?
The right schedule depends on how much you cook, but this is a good general guide.

- After spills: Wipe up fresh spills once the oven has cooled. Fresh messes come off in seconds. Baked-on ones take much longer.
- Monthly: Do a quick wipe of the interior and check the racks and the door glass.
- Every 3 to 6 months: Give the oven a full deep clean. If you roast, bake and broil often, clean it more frequently.
Before You Start: Safety First and Supplies
Safety Checklist
- Read your manual. It tells you which cleaning methods are approved for your model, and which are not.
- Make sure the oven is off and completely cool before you touch the interior.
- Turn off the oven at the power source if you will be working near electrical parts or the heating element.
- Ventilate the kitchen. Open windows and run the extractor fan, especially with chemical cleaners or the self-clean cycle.
- Wear rubber gloves and eye protection when using commercial cleaners.
- Never mix cleaning products. In particular, never combine bleach with vinegar or ammonia, because they can release toxic gases.
- Keep children and pets away from the kitchen while cleaning.
- Protect pet birds. The fumes from self-cleaning cycles and some non-stick coatings can be dangerous to birds, so keep them well away from the kitchen and in a ventilated room.
What You Need

You may also want old towels or newspaper to protect the floor, a stiff-bristled nylon brush, an old toothbrush for corners, and a bin bag for loose debris. Avoid steel wool and abrasive powders on oven interiors and glass, as they can scratch the surfaces.
Which Cleaning Method Should You Choose?
There is no single best way to clean an oven. The right method depends on how dirty it is, how much time you have and what your manual allows.

| Method | Pros | Cons |
|---|---|---|
| Baking soda and vinegar | Inexpensive, low fumes, gentle on surfaces | Needs a long wait and some scraping |
| Self-clean cycle | Almost no scrubbing, handles heavy grime | Very high heat, smoke and odor, not on every oven |
| Commercial oven cleaner | Powerful on old grease, fairly quick | Strong fumes, needs protective gear |
| Steam cleaning | Quick, no chemicals | Only suits light messes |
Method 1: Baking Soda and Vinegar
This is the go-to method for most households. It uses cheap pantry items, produces almost no fumes and works well on moderate buildup.

Step-by-Step
- Empty the oven. Take out the racks, trays, any oven thermometer and loose crumbs. Use a damp cloth or small brush to clear debris.
- Make the paste. Mix about 1/2 cup of baking soda with 2 to 3 tablespoons of water until you get a spreadable paste. Add a little more water if it is too thick.
- Spread it on. Wearing gloves, coat the inside surfaces, concentrating on greasy and burnt areas. Do not apply it onto the heating elements, fan openings or gas vents. Dark patches of paste are normal as it absorbs grease.
- Let it work. Leave it for at least 12 hours, or overnight. For lighter dirt, a few hours may do.
- Wipe out the bulk. Use a damp cloth to remove most of the paste. A plastic scraper helps with stubborn spots.
- Spritz with vinegar. Fill a spray bottle with white vinegar and mist any remaining white residue. It will fizz and loosen the last traces.
- Final wipe. Go over everything with a clean damp cloth until no residue is left, then dry with a microfiber cloth.
- Replace the racks and leave the door open for a short time to air it out.
Tip: For very tough spots, dab a little extra paste directly on the burnt patch, cover it with a damp cloth and leave it for a few more hours.
Method 2: The Self-Clean Cycle
Many modern ovens have a self-clean mode that heats the cavity to a very high temperature, often in the range of 800°F to 900°F (about 430°C to 480°C), turning food residue into ash you can wipe away. A cycle usually runs from about two to six hours depending on the model.
How to Use It Safely
- Check that your oven has a self-clean function and read the manual’s instructions.
- Remove racks, pans and foil. Unless the manual says otherwise, racks can discolor and become harder to slide in the high heat.
- Wipe out heavy spills and loose debris. Large amounts of grease can smoke or flare up.
- Ventilate the kitchen and keep pets, especially birds, out of the area.
- Start the cycle and let it finish. The door will lock automatically and stays locked until the oven cools.
- Once it is fully cool, wipe the grey or white ash with a damp cloth.
Good to know: Do not use commercial oven cleaner in a self-cleaning cycle. Plan to be home while it runs, and stop the cycle and ventilate if you see heavy smoke. Some ovens trip a fuse or show an error after a self-clean, so check the manual for guidance.
Method 3: Commercial Oven Cleaner
When grease is old and baked on, a commercial oven cleaner can save a lot of effort. These products are strong, so use them carefully.
- Check that it is suitable for your oven. Many cleaners should not be used on self-cleaning, continuous-clean or catalytic liners. Read both the product label and the manual.
- Ventilate and protect yourself. Wear rubber gloves and eye protection, open windows and run the fan.
- Apply as directed to the cool interior, avoiding heating elements, fan openings, the door seal and any electrical parts.
- Wait for the time on the label. Do not leave it longer than recommended.
- Wipe off thoroughly with a damp cloth, rinsing it often. Repeat with clean water until no residue or smell is left.
- Air the oven with the door open before cooking again. Residue left behind can smoke when heated.
If you are sensitive to strong smells, choose a low-fume or fragrance-free formula, or stick with baking soda.
Method 4: Steam Cleaning for Light Messes
For a fairly clean oven that just needs a refresh, steam is quick and chemical-free.
- Fill an oven-safe dish or bowl with water. Some people add a few slices of lemon or a splash of white vinegar.
- Place it on the middle rack and heat the oven to about 250°F (120°C) for 20 to 30 minutes.
- Turn the oven off and let it cool slightly, but while it is still warm, carefully remove the dish with oven gloves.
- Wipe the interior with a damp cloth. The steam softens the grime so it comes away easily.
Some ovens include a built-in steam clean feature. Follow the manual, as the water amount and settings vary by model.
How to Clean Oven Racks
Racks can be the dirtiest part, and they are often easiest to clean outside the oven.
- Lay old towels in a bathtub or large sink to protect the surface.
- Place the racks on top and fill with enough hot water to cover them.
- Add a generous squirt of dish soap and about 1/2 cup of baking soda, or drop in a dishwasher tablet.
- Soak for one to two hours, or overnight for heavy buildup.
- Scrub with a nylon brush or non-scratch pad, rinse well and dry before putting them back.
Tip: If the racks are very dirty, a baking soda paste applied before soaking helps. Do not put racks through a self-clean cycle unless the manual says it is allowed.
How to Clean the Oven Door and Glass
Inside the Glass
- Spread a thin layer of baking soda paste on the glass and leave it for 15 to 20 minutes, or longer for heavy staining.
- Wipe with a damp cloth, then spray with vinegar to remove any film.
- Buff dry with a microfiber cloth for a streak-free finish.
Between the Glass Panes
Grease sometimes works its way between the panes of a double or triple-glazed door. Some manufacturers design the door so it can be taken apart for cleaning, and the manual will show how. If it does not, do not force it open. Contact a technician instead.
Outside Surfaces
Wipe the outside of the door, control panel and knobs with a cloth dampened with warm soapy water. Use a cleaner suited to stainless steel for steel finishes, and wipe along the grain. Avoid spraying liquid directly onto controls.
What to Clean, and What to Leave Alone
Knowing what not to scrub is just as important as knowing what to clean.

- Heating elements: Do not spray or scrub them. For electric ovens, burn off light residue by heating the oven, and wipe around them. Never apply cleaner to them.
- Door seal (gasket): Wipe gently with a damp cloth. Harsh cleaners and scrubbing can damage it, which lets heat escape.
- Fan and vents: Avoid getting liquid inside them. Wipe the visible surfaces only.
- Gas burners and igniters: Keep them dry and free of paste or cleaner.
- Enamel and glass: Do not use steel wool or abrasive powders, which can scratch and shorten the life of the surfaces.
Special Cases: Gas, Electric, Steam and Continuous-Clean Ovens
- Electric ovens: The bottom heating element may be exposed or hidden under the floor. Lift or fold it carefully only if the manual allows, and always switch the power off first.
- Gas ovens: Avoid blocking any vents and keep the pilot and burner holes dry. Do not clean around them when the oven is warm.
- Self-cleaning ovens: Use the self-clean cycle or gentle manual cleaning as the manual allows. Many manufacturers advise against commercial cleaners.
- Continuous-clean or catalytic liners: These rough-textured panels absorb grease slowly. Do not scrub them or use abrasive cleaners, which can ruin the coating. Follow the manual for recommended care.
- Steam-clean ovens: Use the built-in steam feature for light messes, then wipe the cavity once it is cool enough to touch.
- Convection or fan ovens: Clean the interior as normal, but take care around the fan cover and elements.
Troubleshooting Stubborn Stains
| Problem | Likely Cause | What to Try |
|---|---|---|
| Thick black crust | Repeated baked-on spills | Reapply baking soda paste for another 12 hours, or use a suitable commercial cleaner. |
| Sticky yellow-brown film | Cooking grease vapor | Warm soapy water, then vinegar, then wipe dry. |
| Cloudy door glass | Grease and baked-on splashes | Baking soda paste with a soft cloth. Avoid abrasives. |
| Smoke when heating after cleaning | Cleaner residue or leftover food | Wipe again with clean damp cloths and air the oven. |
| White chalky streaks | Dried baking soda | Spritz with vinegar and wipe with a damp cloth. |
| Burnt sugar spills | Fruit pies or sweet bakes | Soften with a damp cloth while still lukewarm, then use a plastic scraper. |
| Lingering burnt smell | Hidden spills under the floor or racks | Check all corners and under racks. Air the oven thoroughly. |
How to Keep Your Oven Cleaner for Longer
- Wipe spills when cool. A damp cloth now saves a long scrub later.
- Use a baking tray under pies and casseroles to catch drips. Place it on a lower rack, not directly on the oven floor, unless the manual permits it.
- Do not line the bottom of the oven with foil unless the manufacturer says it is safe. It can trap heat and damage the oven lining or elements.
- Cover dishes with lids or foil to cut splatter.
- Do not overfill dishes, especially pies and bubbling casseroles.
- Use oven-safe liners designed for your oven if the manual approves them.
- Add a regular wipe-down to your routine, such as the first of every month.
- Keep the door seal clean to maintain good insulation.
Common Mistakes to Avoid
- Cleaning a hot oven. Wait until it is fully cooled.
- Using steel wool, wire brushes or abrasive powder on enamel or glass.
- Spraying cleaner on heating elements, fans or electronics.
- Mixing bleach with vinegar or ammonia.
- Leaving residue behind, which can smoke or smell when the oven is next used.
- Running a self-clean cycle with heavy grease, racks or foil inside.
- Ignoring the manual for your specific model.
- Skipping ventilation when using chemicals.
Choosing Oven Cleaning Products and Tools
Types of Oven Cleaners
- Foam or gel oven cleaners: Cling to vertical surfaces and tackle thick grime. Check the label for compatibility with your oven.
- Low-fume or fragrance-free formulas: Better for sensitive users and small kitchens.
- Plant-based or eco-friendly cleaners: Gentler and good for light to moderate dirt, though they may need longer contact time.
- Baking soda and vinegar: The budget option that works for most routine cleans.
- Cleaning pastes: Ready-made, spreadable options that are gentler than caustic sprays.
Handy Tools
- Plastic or silicone scrapers: Lift burnt-on food without scratching.
- Non-scratch scrub pads and nylon brushes: Safe for enamel and racks.
- Long-handled brushes: Reach the back and corners.
- Microfiber cloths: Streak-free finishing for glass and steel.
- Heavy-duty rubber gloves and eye protection: Essential for chemical cleaners.
- Rack soaking bags or large trays: Make rack cleaning easier without taking over the bathtub.
- Oven liners and drip trays: Choose ones that are approved for your type of oven.
What to Look for Before You Buy
- Check that the product states it is suitable for your oven type.
- Look at the fume level and ventilation advice on the label.
- Consider the contact time and how much scrubbing it needs.
- Check the safety directions and whether gloves are recommended.
- Compare the value per use, not just the shelf price.
Frequently Asked Questions
What is the easiest way to clean an oven?
For most people, the baking soda and water paste is the easiest and safest option. If your oven has a self-clean function, that is the least labor-intensive route for heavy grime.
Can I clean the oven without chemicals?
Yes. Baking soda, white vinegar, warm soapy water and steam clean most ovens well. They simply need a longer wait than strong commercial cleaners.
Is it safe to use the self-clean cycle?
It is designed to be safe, but it does produce very high heat and some smoke and odor. Remove racks and loose debris, ventilate the room, keep pets (especially birds) away and stay at home while it runs.
How do I clean a very dirty oven?
Start with a baking soda paste and give it 12 hours or more, repeating if necessary. If the grime remains, use a commercial cleaner that is approved for your oven, or the self-clean cycle if your model has one.
Can I use vinegar alone to clean an oven?
Vinegar is good for light grease and removing baking soda residue, but on its own it struggles with thick baked-on grime. It works best as a partner to baking soda.
How do I get rid of the burning smell after cleaning?
It usually comes from leftover cleaner or crumbs. Wipe again with clean damp cloths, air the oven, and if needed, heat it empty at a moderate temperature for a short time with the kitchen well ventilated.
Can I put oven racks in the dishwasher?
Often they will not fit, and baked-on grease can be too much for a dishwasher. A bath soak with dish soap and baking soda is more effective.
Does aluminum foil protect the oven floor?
Many manufacturers advise against lining the bottom, because it can trap heat or damage the oven. Place a tray on a lower rack instead and check the manual.
How do I clean between the glass on the oven door?
Check the manual to see whether the door can be removed or disassembled. If it cannot, a technician can do it safely.
Final Thoughts
Learning how to clean an oven comes down to picking the right method for your oven and being patient. Baking soda and vinegar handle most jobs, the self-clean cycle and commercial cleaners are there for heavy grime, and steam keeps a lightly used oven fresh. Remember to protect the heating elements, door seal and fan, and always follow your manual.
A little regular care, such as wiping spills when they cool and doing a deeper clean every few months, keeps the job quick and your food tasting the way it should. Set a reminder, grab your gloves and give your oven the refresh it deserves.
Disclosure: This article is for general information only. Always follow your appliance manual and the product label instructions. [Add your affiliate disclosure here if you earn commissions.]